
Steg 1.
Log in to Backoffice through https://vm.baemingo.se/#/
Step 2.
Get to POS Layouts by clicking on PIM/POS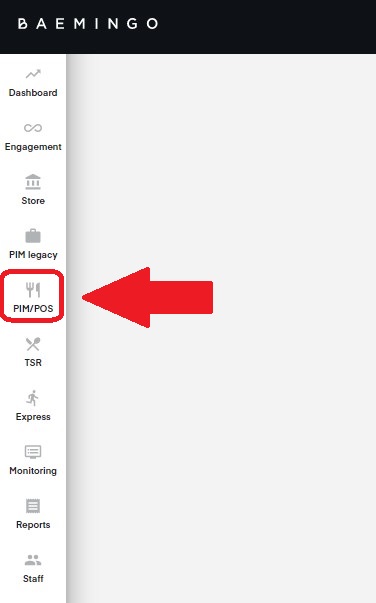
Step 3.
Press on the POS-button at the bottom of the screen.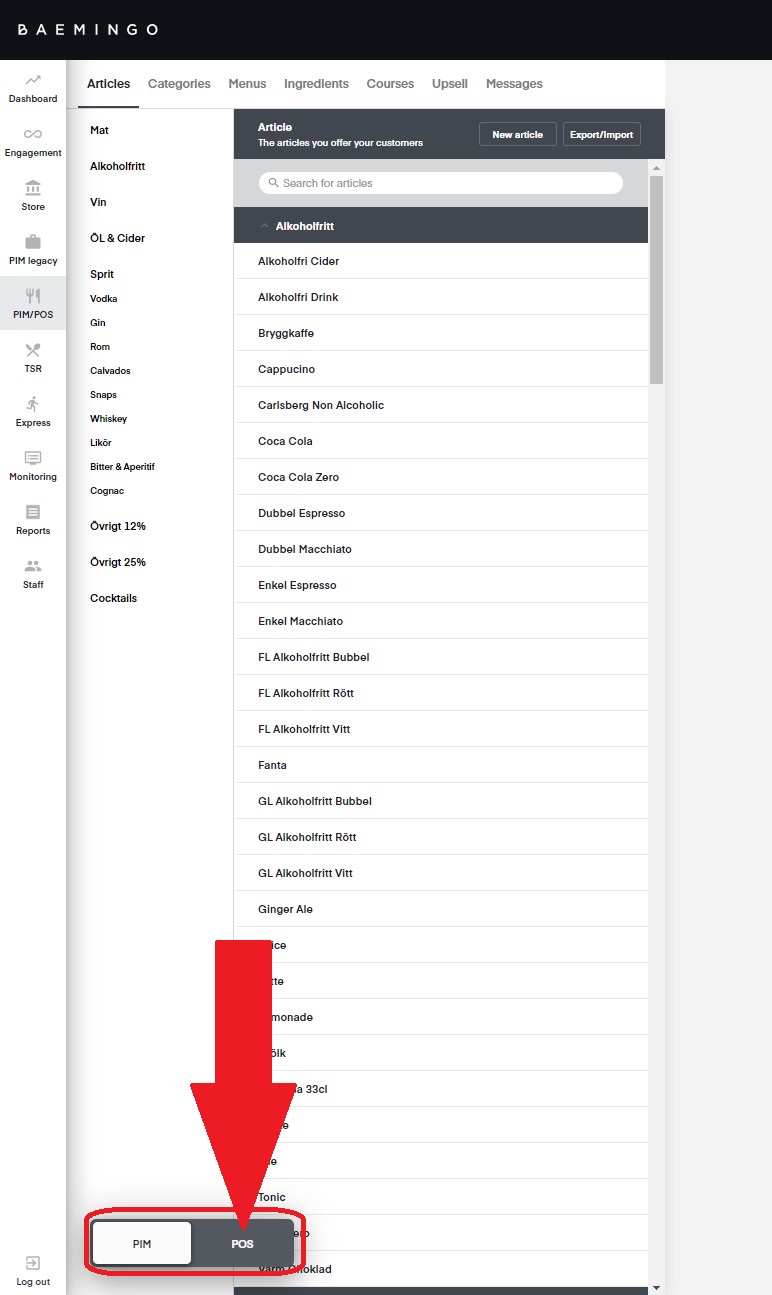
Steg 3.
Click the "CREATE LAYOUT" button in the header or in the middle of the screen.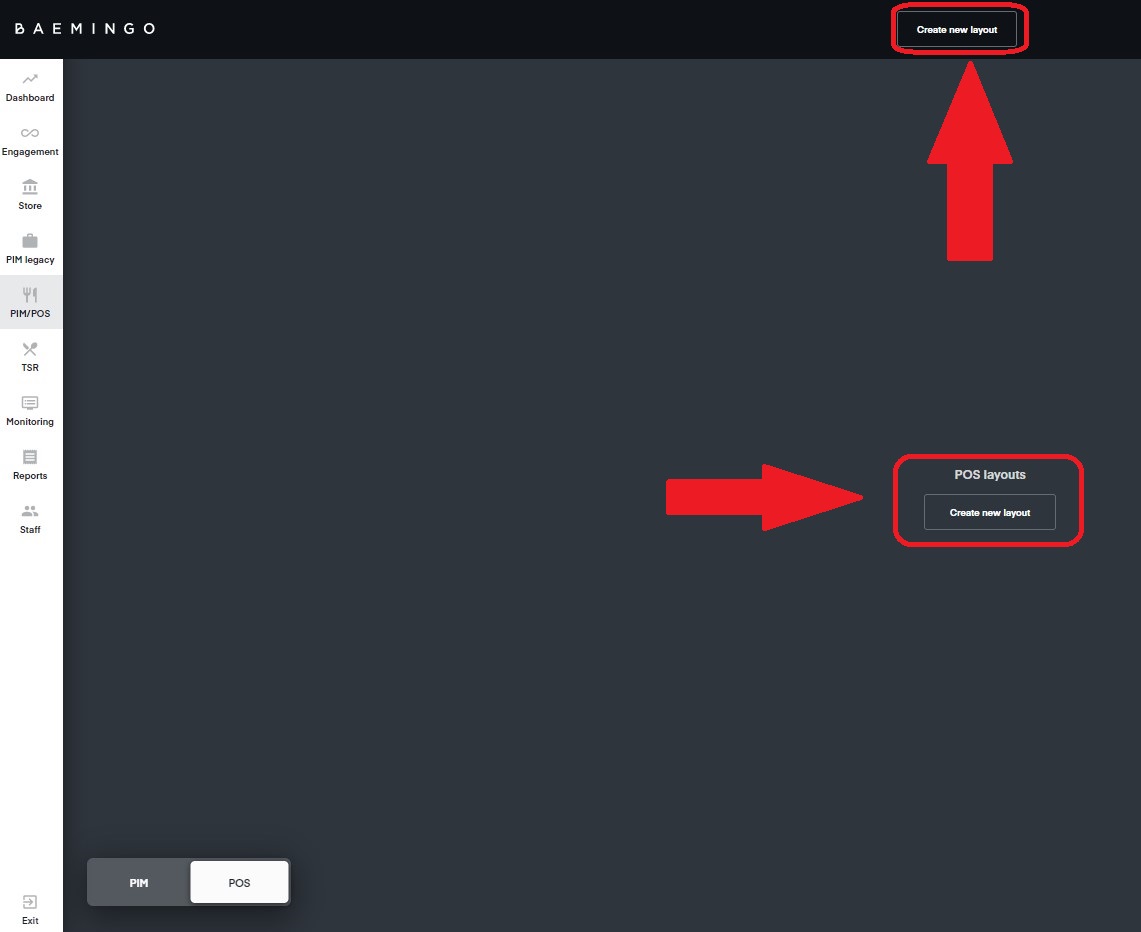
Steg 4.
Under "NAME" enter whatever you want this layout to be named, for example "Dining room" or "Main Layout".
Further down you can name the tabs on the left in your POS layout, e.g. "Lunch", "Drinks"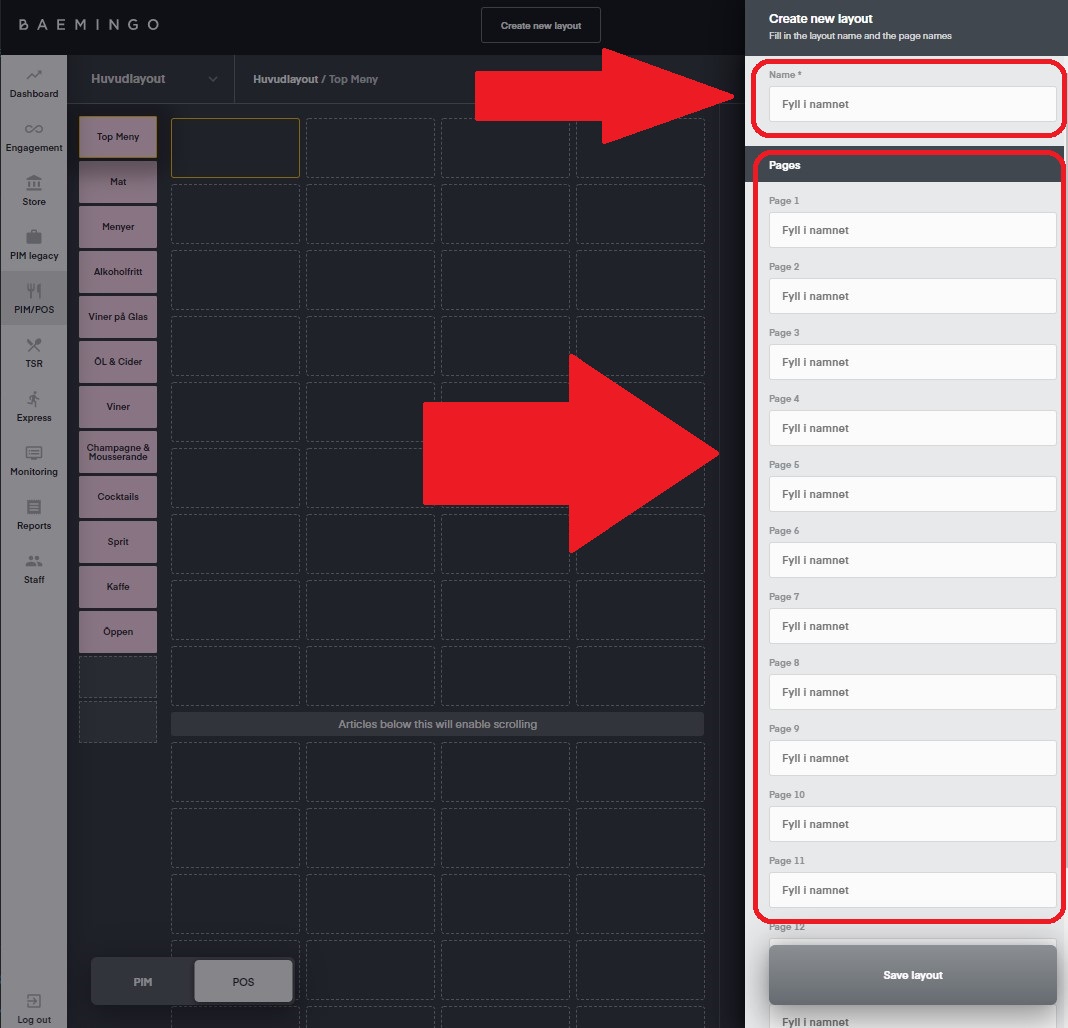
Step 5.
Press the "save layout" button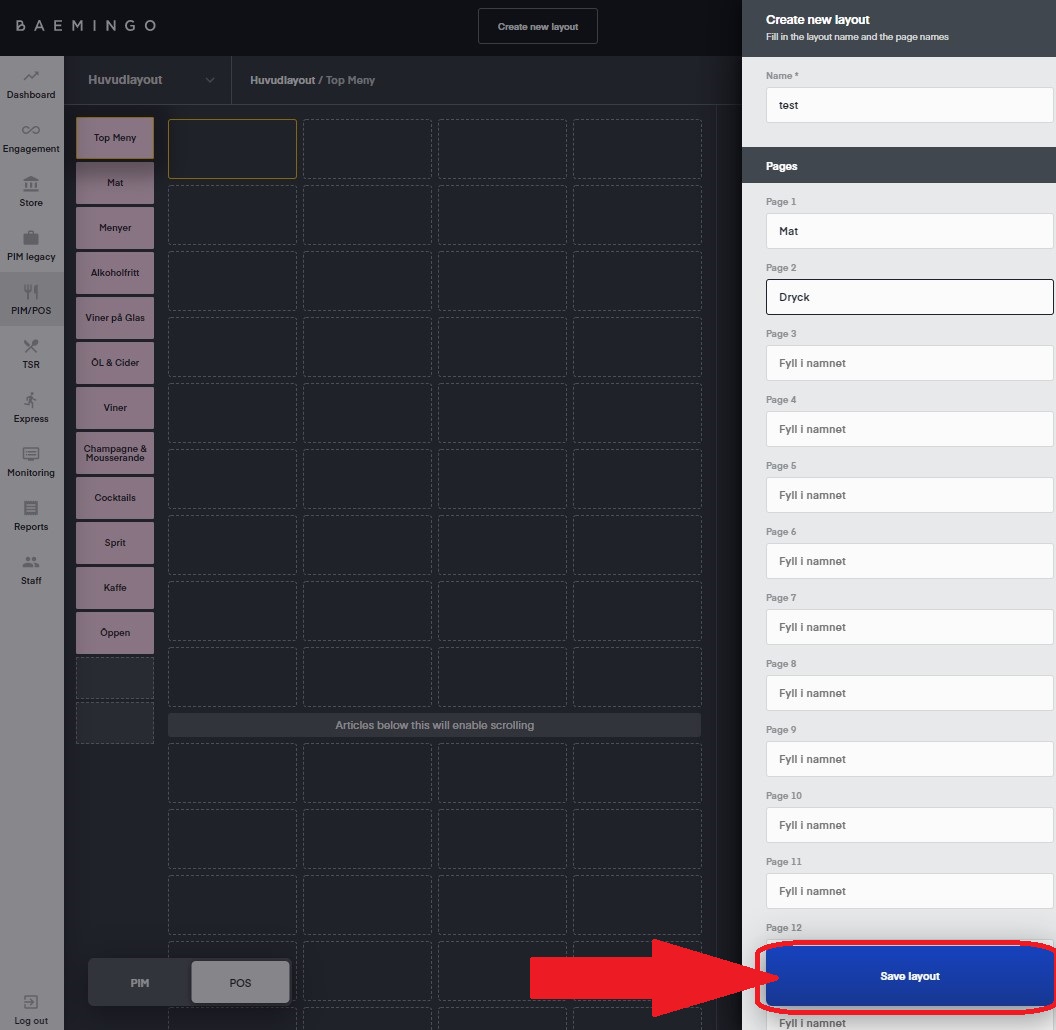
Steg 6.
Now you can start filling each tab with the food and drink you want.
On the right you will find further adjustments to the layout and all articles.
In the upper right part, you can adjust the name of the tab, color, size of the grid, tabs and campaigns.
In the lower right corner, you can insert the articles into the view by clicking on the "add" button, which is placed to the right of the respective article. If the article is already added, this is exchanged for a "remove" button, which can then be used to remove the item.
You can also move the articles around in the Pos Layout by drag & drop. You also have a search function where you can search for the product you are looking for. 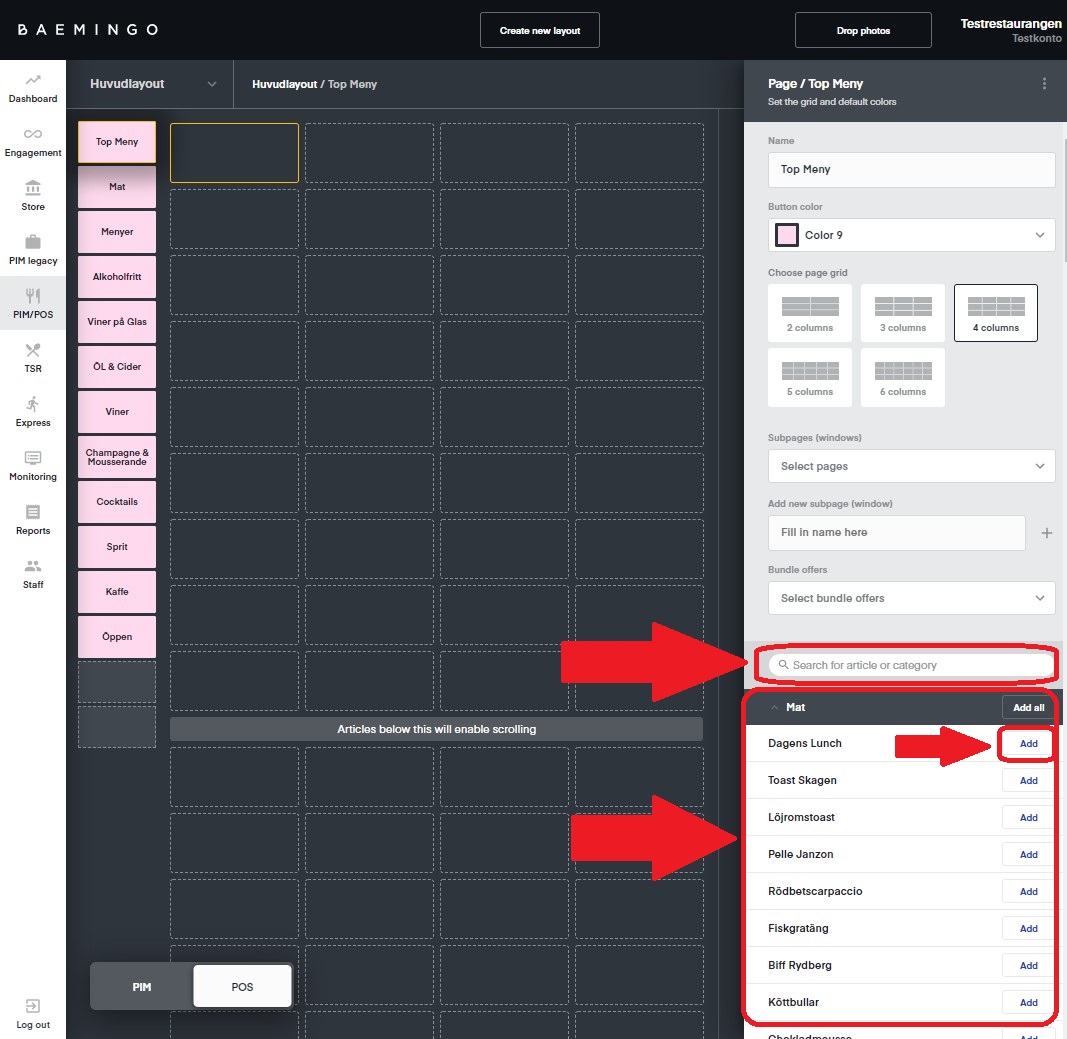
Your POS layout is now created
Each time you change your layout you also need to restart your cash register to be able to see the changes in the baemingo app.